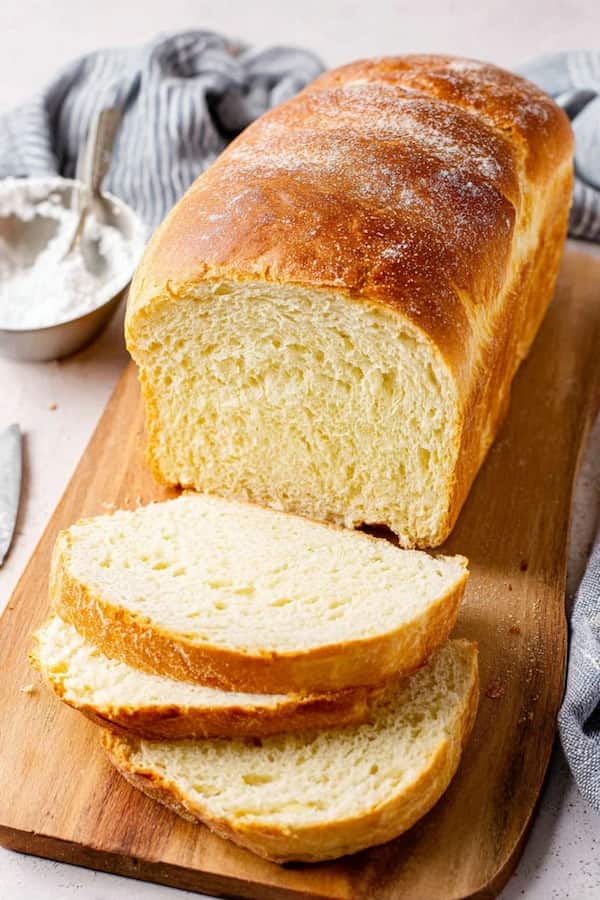
This easy homemade sandwich bread is soft, fluffy, and perfect for everyday use — whether you’re making toast in the morning, sandwiches for lunch, or serving it alongside soup for dinner.
It’s the kind of recipe that proves homemade bread doesn’t need to be complicated. With a few simple ingredients and a little patience, you can bake a loaf that’s better than anything from the store.
How I Learned to Bake Bread
I used to think bread baking was intimidating — something best left to professional bakers. The first time I tried it, I was nervous the yeast wouldn’t rise or the dough would turn dense. But after a few tries, I realized that bread isn’t about perfection — it’s about patience.
Once I learned the rhythm of it — mixing, kneading, waiting, baking — it became second nature. This sandwich bread recipe came from that journey. It’s simple, forgiving, and yields consistent, beautiful results every single time.
Now I bake it weekly, and I promise — once you try it, you’ll never go back to store-bought bread again.
Ingredients (Makes 1 Loaf / Serves 8–10 Slices)
- 3 cups all-purpose flour (plus a little extra for kneading)
- 2 ¼ teaspoons active dry yeast (1 packet)
- 1 cup warm water (around 105°F or 40°C)
- 2 tablespoons sugar or honey
- 2 tablespoons unsalted butter, melted (plus more for brushing)
- 1 teaspoon salt
- ¼ cup milk (optional for extra softness)
Activate the Yeast
In a small bowl or measuring cup, combine the warm water and sugar (or honey). Sprinkle the yeast over the top and stir lightly. Let it sit for 5–10 minutes, until it becomes frothy and bubbly.
If it doesn’t foam, your yeast might be old or the water may have been too hot or cold — start fresh. This step is key for a soft, well-risen loaf.
Mix the Dough
In a large mixing bowl, combine 2 ½ cups of flour and salt. Make a well in the center and pour in the yeast mixture, melted butter, and milk (if using).
Stir with a wooden spoon or spatula until the dough begins to come together. It should be slightly sticky but not wet. Add more flour a little at a time if it feels too soft.
This is the point where the magic starts — the ingredients begin to transform into something living, warm, and full of potential.
Knead Until Smooth
Transfer the dough to a lightly floured surface and knead for about 8–10 minutes. Push the dough away from you with the heel of your hand, fold it over, and turn. Repeat the rhythm — press, fold, turn.
By the end, the dough should be smooth and elastic. When you poke it lightly, it should spring back.
If you prefer using a stand mixer, knead with the dough hook on medium speed for about 6 minutes.
Let It Rise
Lightly grease a large bowl with oil or butter. Place the dough inside, turning once so it’s coated on all sides. Cover with a clean kitchen towel or plastic wrap and let it rise in a warm spot for 1 to 1½ hours, or until doubled in size.
You’ll know it’s ready when you press your finger into the dough and it slowly bounces back.
This waiting part might feel long, but it’s where the flavor develops and the texture becomes soft and airy.
Shape the Loaf
Once the dough has risen, gently punch it down to release the air. Turn it onto a floured surface and flatten it into a rectangle — roughly the length of your loaf pan.
Roll the dough up tightly, pinching the seam as you go, and tuck the ends underneath. Place the roll seam-side down in a greased 9×5-inch loaf pan.
Cover again and let it rise for another 30–40 minutes, or until the dough crowns about an inch above the rim of the pan.
Bake Until Golden
Preheat your oven to 375°F (190°C). Bake the loaf for 30–35 minutes, until the top is golden brown and the bread sounds hollow when tapped.
If the top is browning too quickly, cover it loosely with foil for the last 10 minutes.
Remove from the oven and immediately brush the top with a little melted butter — it gives the crust that soft, shiny finish.
Let the loaf cool in the pan for 10 minutes, then transfer to a wire rack to cool completely before slicing.
Slice and Enjoy
Once cooled, slice your bread with a serrated knife and enjoy that first warm, tender piece. It’s perfect with butter, jam, or as the base for your favorite sandwich.
This bread keeps beautifully — soft and flavorful for days, with that just-baked taste that store-bought loaves can’t match.
My Tips for Perfect Sandwich Bread
- Use the right water temperature. Warm but not hot — think bathwater warm. Too hot kills the yeast; too cold slows it down.
- Don’t rush the rise. Let the dough double naturally — good bread takes time.
- Knead properly. Kneading develops gluten, which gives bread its structure and chew.
- Check the texture. If your dough is sticky but manageable, it’s perfect. Too dry will make dense bread.
- Butter the top. It keeps the crust soft and adds flavor.
How to Store and Freeze
- Room temperature: Store in an airtight bag or wrapped in foil for up to 3 days.
- Fridge: Keeps for up to 1 week, though refrigeration can dry it out slightly.
- Freezer: Wrap tightly and freeze for up to 2 months. Thaw at room temperature and reheat for a few minutes in the oven for that just-baked feel.
Pro tip: Slice before freezing so you can grab individual pieces whenever you want toast or sandwiches.
Variations to Try
Once you’ve mastered this basic recipe, try customizing it:
- Honey Wheat Bread: Replace 1 cup of flour with whole wheat flour and add 1 tablespoon of honey.
- Garlic Herb Bread: Mix in 1 teaspoon of garlic powder and 1 tablespoon of dried Italian herbs for a savory twist.
- Oat Bread: Add ¼ cup of rolled oats to the dough and sprinkle some on top before baking.
- Cinnamon Swirl Bread: Roll the dough with a layer of cinnamon and brown sugar for a breakfast version.
The beauty of homemade bread is that you can make it your own.
Why This Recipe Always Works
This sandwich bread is soft, light, and flavorful because it balances everything — moisture, rise time, and just the right amount of kneading. The butter adds richness, while the milk gives the loaf a tender crumb.
It’s not fussy or complicated — just the right mix of technique and comfort. Every step feels hands-on, yet relaxing — like reconnecting with something simple and real.
There’s something deeply satisfying about slicing into a loaf you made yourself — the golden crust, the soft middle, and that smell that makes your kitchen feel alive.
Tools You’ll Need
- Mixing bowls
- Measuring cups and spoons
- Wooden spoon or spatula
- Loaf pan (9×5-inch)
- Clean towel or plastic wrap
- Cooling rack
Related Questions
1. Can I Use Whole Wheat Flour Instead of All-Purpose?
Yes! For a heartier texture, substitute up to half of the all-purpose flour with whole wheat. If you replace all of it, the loaf will be denser — add an extra tablespoon of honey and a bit more water to keep it soft.
2. What If I Don’t Have a Loaf Pan?
No problem! You can shape the dough into a round and bake it on a parchment-lined baking sheet. It won’t look like sandwich bread, but it’ll still be delicious — rustic and golden, perfect for slicing.
The Joy of Homemade Bread
There’s something deeply grounding about making your own bread. The simple act of kneading, waiting, and watching it rise feels like therapy — a reminder that good things take time.
When you pull this loaf from the oven, golden and warm, it’s more than bread — it’s the reward for slowing down, for creating something from scratch. Spread it with butter while it’s still warm, and you’ll understand why baking bread never gets old.
It’s soft, comforting, and beautifully simple — a loaf that turns an ordinary day into something a little special.
Meta Description:
This easy homemade sandwich bread recipe makes soft, fluffy, golden loaves with simple ingredients. Perfect for toast, sandwiches, or everyday meals — better than store-bought and beginner-friendly.