Baking your own loaf of bread is one of the most rewarding skills you can learn in a home kitchen. This whole grain recipe focuses on a soft interior and a sturdy crust without the complicated steps usually found in artisan baking.
It is a reliable, everyday bread that fills your house with a wonderful aroma and provides a healthy base for any meal.
Ingredients
This recipe makes 1 large loaf, which provides about 12 to 14 thick slices depending on how you cut it.
- 2 cups whole wheat flour
- 1.5 cups all-purpose flour (plus extra for dusting)
- 1.5 cups warm water (about 110°F)
- 2.25 teaspoons active dry yeast (one standard packet)
- 2 tablespoons honey or maple syrup
- 2 tablespoons olive oil or melted butter
- 1.5 teaspoons salt
- 1/4 cup rolled oats (optional, for the top)
The Grain
The secret to a top-notch whole grain loaf is finding the balance between health and texture. If you use 100% whole wheat flour, the bread can often turn out dense and heavy like a brick. By mixing in a portion of all-purpose flour, you give the bread enough structure and “lift” to stay soft and fluffy.
The honey in this recipe isn’t just for sweetness; it actually helps soften the bran in the whole wheat, making the final slice much more pleasant to eat.
Whole wheat flour contains the germ and the bran of the grain, which means it has more fiber and nutrients than white flour.
However, those extra parts can be sharp and can cut through the gluten strands as the dough rises. This is why we don’t over-handle the dough. We want to treat it with just enough care to
Yeast Wake
In a large bowl, combine the warm water, honey, and yeast. Stir it gently and let it sit for about five to ten minutes. You are looking for a layer of foam to form on the surface.
This is called “blooming” the yeast, and it proves that the yeast is alive and ready to work. If the water is too hot, it will kill the yeast; if it is too cold, the yeast won’t wake up. It should feel like warm bath water.
Rough Mix
Add the olive oil and salt to the yeast mixture. Slowly stir in the whole wheat flour first, followed by the all-purpose flour. Use a wooden spoon to mix until a shaggy, sticky ball forms and there are no dry patches of flour left in the bowl.
At this stage, the dough will look messy and unappealing, but that is perfectly normal. Let it rest for five minutes to allow the flour to fully hydrate.
Hand Work
Turn the dough out onto a lightly floured surface. Start kneading by pushing the dough away from you with the heels of your hands, folding it back, and turning it slightly. Repeat this for about six to eight minutes.
You will feel the dough change from a sticky mess to a smooth, elastic ball. If the dough sticks to your hands, add a tiny bit more all-purpose flour, but be careful not to add too much or the bread will be dry.
First Rise
Lightly oil a clean bowl and place the dough inside. Cover it with a damp cloth or plastic wrap and put it in a warm, draft-free spot. Let it rise until it has doubled in size, which usually takes about an hour.
If your kitchen is cold, you can put the bowl inside an oven that is turned off with the oven light on. The warmth from the bulb is often enough to help the yeast thrive.
Loaf Shape
Gently punch the dough down to release the air. On a clean surface, flatten the dough into a rectangle and then roll it up tightly into a log shape. Pinch the seam at the bottom to seal it. Place the log into a greased 9×5 inch loaf pan.
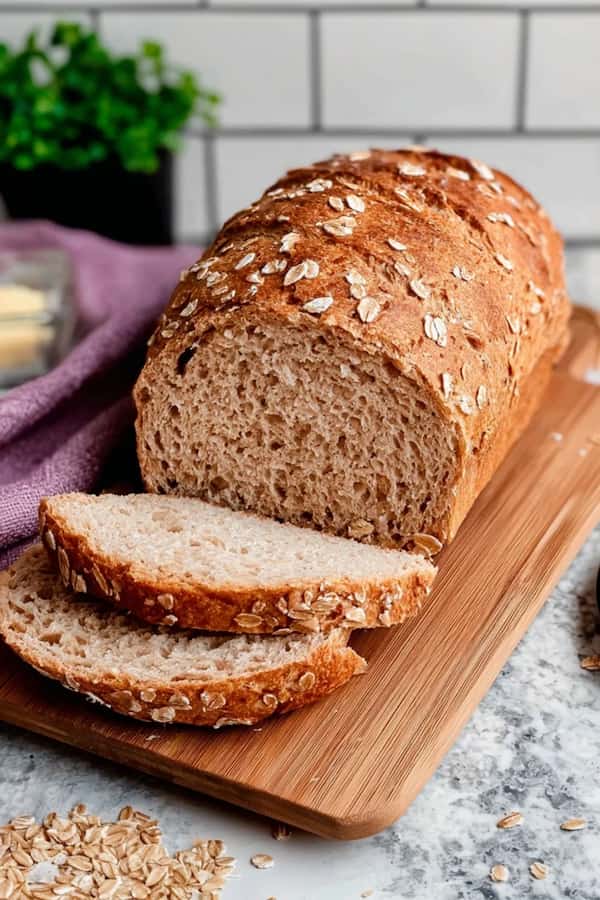
If you want a rustic look, brush the top with a little water and sprinkle the rolled oats over it. Cover and let it rise again for another 30 to 45 minutes.
Hot Bake
Preheat your oven to 375°F. Slide the pan onto the center rack and bake for 30 to 35 minutes. You will know the bread is done when the top is deep golden brown and the loaf sounds hollow when you tap the bottom.
Remove it from the pan immediately and place it on a wire rack. This prevents the steam from making the bottom of your fresh loaf soggy.
Better Slices
To get a “top-notch” slice, you must let the bread cool completely before cutting into it. I know it is tempting to slice it while it is hot and steaming, but the bread is actually still “cooking” on the inside.
If you cut it too early, the steam escapes too fast, and the interior can become gummy or lose its softness. Waiting at least an hour ensures a clean cut and a better texture.
Another tip for a professional finish is the “steam trick.” Place a shallow pan of water on the bottom rack of the oven while it preheats. The steam created during the first ten minutes of baking allows the bread to expand fully before the crust sets.
This results in a taller loaf with a much better “oven spring.” It is a simple technique used by professional bakers to get that perfect bakery look at home.
Common Pitfalls
The most common mistake is using too much flour during the kneading process. It is tempting to keep adding flour so the dough doesn’t stick to your fingers, but this leads to a heavy, dry loaf. Try to keep the dough as tacky as possible.
Using a bench scraper can help you move the dough around without needing to coat it in extra flour.
Another issue is the water temperature. If you use boiling water, you will kill the yeast and the bread will never rise. If you use cold water, the rise will take four or five hours instead of one. If you aren’t sure, err on the side of cooler water. It is better for the bread to rise slowly than to not rise at all.
Why Is My Bread So Dense?
Density in whole grain bread usually comes from two things: old yeast or under-kneading. If your yeast didn’t foam up in the first step, your bread will not rise properly. Always check the expiration date on your yeast packets.
Additionally, if you don’t knead the dough long enough, the gluten doesn’t develop. Gluten is like a balloon that holds the air produced by the yeast. Without strong gluten, the air escapes, and the loaf stays flat and heavy. Make sure you get that “smooth and elastic” feel before you stop kneading.
How Should I Store Homemade Bread?
Since this bread has no preservatives, it will not last as long as store-bought loaves. Keep it in a paper bag or a bread box at room temperature for up to three days. Do not put it in the refrigerator, as the cold air actually pulls moisture out of the bread and makes it go stale faster.
If you can’t finish the loaf in a few days, slice it completely and freeze the slices in a sealed bag. You can pop a frozen slice directly into the toaster whenever you need a quick snack.