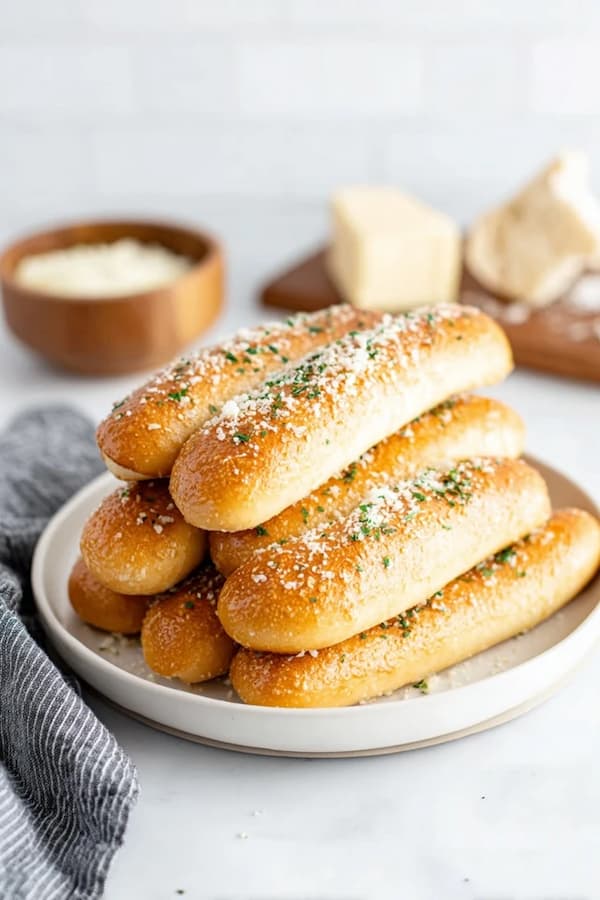
Easy garlic butter breadsticks are the ultimate comfort food that can turn any simple pasta night into a full Italian feast. This recipe uses a straightforward dough that results in a soft, pillowy interior and a golden, savory crust.
Making them at home is far better than buying frozen versions because you can control the amount of fresh garlic and herbs in every bite.
Ingredients
This recipe makes 12 large breadsticks, which provides about 6 servings if you are serving them as a side dish.
- 1 cup warm water (110°F)
- 2 tablespoons granulated sugar
- 1 packet (2 1/4 tsp) active dry yeast
- 3 tablespoons unsalted butter, melted
- 1 teaspoon sea salt
- 3 cups all-purpose flour
- 1/4 cup unsalted butter (for the topping)
- 3 cloves garlic, minced
- 1 tablespoon fresh parsley, chopped
- 1/4 cup grated Parmesan cheese
Yeast Bloom
A top-notch breadstick begins with ensuring your yeast is healthy and active. In a large bowl, combine your warm water and sugar. The sugar acts as food for the yeast, helping it to wake up and produce the gases needed for a good rise. Sprinkle the yeast over the surface of the water and let it sit for about ten minutes.
You should see a thick, foamy layer develop on top of the water. This foam is the proof that your yeast is working correctly. Once you see this, stir in your three tablespoons of melted butter and the salt.
Using warm water that is specifically around 110 degrees is vital; if it is too hot, it will kill the yeast, and if it is too cold, the breadsticks will not rise.
Dough Mix
Start adding your all-purpose flour to the bowl one cup at a time. If you have a stand mixer, use the dough hook on low speed, but this dough is very easy to mix by hand with a sturdy spoon.
Continue adding flour until the dough pulls away from the sides of the bowl and forms a soft ball. It should feel slightly tacky but should not stick to your fingers.
Knead the dough for about five to seven minutes on a lightly floured surface. You want to develop the gluten until the dough is smooth and elastic. If you poke the dough and it springs back quickly, you know it is ready.
Keeping the dough soft is the secret to a professional-grade breadstick that stays light and airy after baking.
First Rise
Place the dough in a lightly greased bowl and cover it with a clean kitchen towel. Put the bowl in a warm spot in your kitchen where there are no cold drafts. You need to let the dough rise until it has doubled in size, which usually takes about one hour. This stage allows the yeast to expand the dough, creating a soft structure.
Be patient during this rise. If your kitchen is cool, it might take a little longer. A good trick is to place the bowl in the oven with the light turned on but the heat turned off. The small amount of warmth from the bulb is often enough to help the dough grow perfectly. Once the dough has doubled, gently press it down to release the air bubbles.
Stick Shape
Divide your dough into twelve equal pieces. To make them look like a top-notch blog creation, you can weigh each piece on a kitchen scale to ensure they are the same size. Roll each piece of dough into a rope about eight inches long. If the dough keeps shrinking back, let it rest for five minutes to allow the gluten to relax before you try rolling it again.
Place the breadsticks on a baking sheet lined with parchment paper. Arrange them in rows, leaving at least an inch of space between each one so they have room to grow. Cover the tray again and let them rise for a second time for about twenty minutes. This secondary rise is what makes the breadsticks extra fluffy and soft.
Garlic Melt
While the breadsticks are rising for the second time, preheat your oven to 400°F. In a small saucepan, melt the remaining quarter-cup of butter over low heat. Add your minced garlic to the butter and cook for just two minutes.
You don’t want to brown the garlic; you just want to infuse the butter with that savory flavor and remove the raw “bite” of the garlic.
Stir in the fresh parsley and set the mixture aside. The scent of garlic and butter warming on the stove is one of the best parts of this recipe.
Using fresh garlic instead of garlic powder is a hallmark of a high-quality food blog recipe. It provides a much deeper, more authentic taste that pairs perfectly with the warm bread.
Gold Bake
Slide the baking sheet into the center of the oven and bake for 10 to 12 minutes. You are looking for a light golden color on the tops and a firm bottom. Do not over-bake them, or they will become hard and crunchy rather than soft and pillowy.
As soon as you remove them from the oven, brush the warm garlic butter generously over every breadstick.
Sprinkle the grated Parmesan cheese over the buttered sticks immediately. The heat from the bread will help the cheese stick and melt slightly.
Transfer the breadsticks to a basket lined with a cloth to keep them warm while you serve dinner. The combination of fresh bread, melted butter, and salty cheese is a classic for a reason.
Better Texture
To get a “top-notch” result, focus on the moisture of your dough. A slightly wetter dough will always result in a softer breadstick. If you add too much flour, the dough will become heavy and the breadsticks will feel more like dense rolls. Aim for a dough that feels like a soft marshmallow when you are kneading it.
Another tip is to use bread flour if you have it. Bread flour has a higher protein content than all-purpose flour, which gives the breadsticks a bit more “chew” and structure. If you prefer a very soft, melt-in-your-mouth texture, stick with all-purpose flour. This small choice allows you to customize the recipe to your personal preference.
Common Pitfalls
The biggest mistake is over-baking. Because these breadsticks are thin, they can dry out very quickly. Start checking them at the nine-minute mark. They should be just starting to turn brown. Another issue is using old yeast.
If your yeast doesn’t foam during the bloom stage, throw it out and start over with a fresh packet. Your bread will not rise if the yeast is dead.
Finally, make sure your garlic is minced very fine. Large chunks of garlic can be overwhelming and might not soften enough during the brief time they are in the butter.
A fine mince ensures that every bite has an even distribution of flavor without any harsh, spicy garlic pieces.
Can I Freeze These Breadsticks?
Yes, these breadsticks are great for freezing. You can freeze the baked breadsticks once they have cooled completely. Wrap them tightly in foil and place them in a freezer bag for up to three months.
To reheat, just place the frozen breadsticks in a 350°F oven for about five to eight minutes until they are warm and soft again. I recommend adding a fresh brush of garlic butter after reheating to restore that “just-baked” shine.
How Do I Make These Cheesy Breadsticks?
If you want a version that is covered in melted cheese, you can modify the baking step. Five minutes before the breadsticks are finished baking, pull the tray out and sprinkle a cup of shredded mozzarella cheese over the tops.
Return them to the oven until the cheese is bubbly and starting to brown. Then, finish with the garlic butter and Parmesan as usual. This creates a much heavier, more indulgent side dish that is a favorite for kids and parties.
Final Thoughts
Easy garlic butter breadsticks are a testament to how simple ingredients can create something far better than anything you can buy in a store. By focusing on a soft dough and fresh garlic, you can create a top-notch side dish that will be the highlight of your dinner. They are fast, flavorful, and incredibly satisfying.
Keep your water warm, your dough soft, and your garlic fresh. These simple rules are the key to a successful breadstick. It is a savory, comforting recipe that works for any meal.
Would you like me to show you how to make a “Marinara Dipping Sauce” from scratch, or would you prefer a recipe for “Homemade Pizza Dough” to use for your next meal?
Ingredients
Method
- In a large bowl, combine your warm water and sugar. Sprinkle the yeast over the surface of the water and let it sit for about ten minutes.
- Start adding your all-purpose flour to the bowl one cup at a time. If you have a stand mixer, use the dough hook on low speed, but this dough is very easy to mix by hand with a sturdy spoon.
- Continue adding flour until the dough pulls away from the sides of the bowl and forms a soft ball. It should feel slightly tacky but should not stick to your fingers.
- Knead the dough for about five to seven minutes on a lightly floured surface.
- Place the dough in a lightly greased bowl and cover it with a clean kitchen towel. You need to let the dough rise until it has doubled in size, which usually takes about one hour. Once the dough has doubled, gently press it down to release the air bubbles.
- Divide your dough into twelve equal pieces. To make them look like a top-notch blog creation, you can weigh each piece on a kitchen scale to ensure they are the same size. Roll each piece of dough into a rope about eight inches long.
- Place the breadsticks on a baking sheet lined with parchment paper.
Garlic Melt
- While the breadsticks are rising for the second time, preheat your oven to 400°F. In a small saucepan, melt the remaining quarter-cup of butter over low heat. Add your minced garlic to the butter and cook for just two minutes. Stir in the fresh parsley and set the mixture aside.
Gold Bake
- Slide the baking sheet into the center of the oven and bake for 10 to 12 minutes. You are looking for a light golden color on the tops and a firm bottom. As soon as you remove them from the oven, brush the warm garlic butter generously over every breadstick.
- Sprinkle the grated Parmesan cheese over the buttered sticks immediately. The heat from the bread will help the cheese stick and melt slightly.