The first time I made pita bread, I was amazed at how easy it actually was. A few simple ingredients, a little resting time, and a quick cook on a hot surface — and suddenly, you’ve got puffy, golden pita that tastes better than anything store-bought.
Homemade pita is soft, aromatic, and versatile. Whether you’re making falafel wraps, dipping into hummus, or scooping up tzatziki, this recipe will become one of your kitchen staples.
Why You’ll Love It
Homemade pita bread is fresher, softer, and far more flavorful than packaged versions. You can make it as thin or thick as you like, bake it in the oven, or cook it right on the stovetop.
Plus, it’s made with ingredients you already have in your pantry — no preservatives, no fuss. Once you try it warm and fresh, it’s hard to go back to store-bought pitas.
Ingredients (Makes 8 Pitas)
- 2 ½ cups all-purpose flour (plus more for dusting)
- 1 teaspoon salt
- 1 teaspoon sugar
- 1 packet (2 ¼ teaspoons) instant yeast
- 1 cup warm water (about 100°F)
- 2 tablespoons olive oil
Optional: sprinkle of flour or semolina for dusting before baking
Mix the Dough
In a large bowl, combine warm water, sugar, and yeast. Let it sit for about 5 minutes until foamy — that’s how you know the yeast is active.
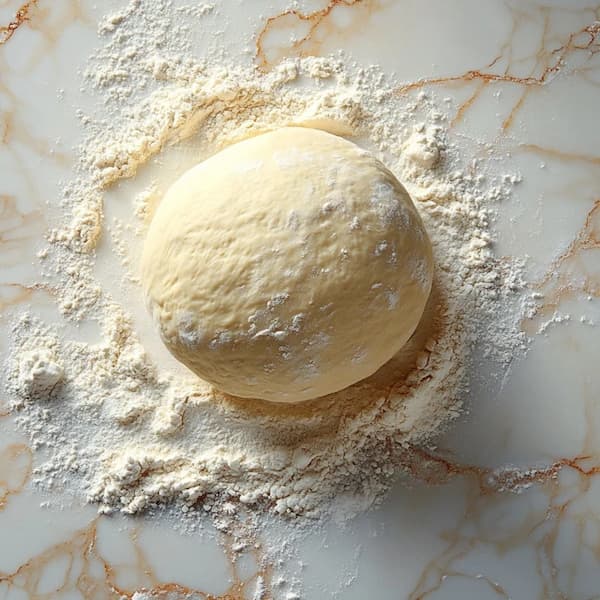
Add flour, salt, and olive oil. Mix until the dough starts to come together, then knead for about 6–8 minutes on a lightly floured surface until smooth and elastic. The dough should feel soft but not sticky.
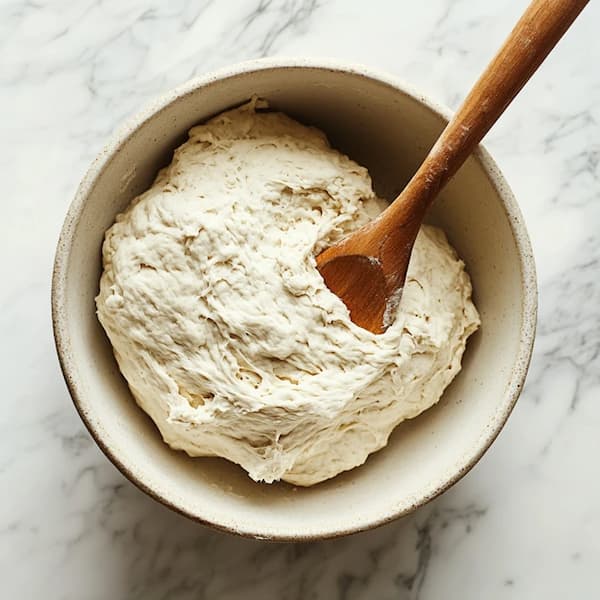
If you prefer, you can use a stand mixer with a dough hook — it’ll do the kneading for you in about 5 minutes.
Let It Rise
Place the dough in a lightly oiled bowl, cover it with a damp towel or plastic wrap, and let it rise in a warm spot for about 1–1.5 hours, or until doubled in size.
This is where the magic starts — the yeast creates air pockets that will later puff up when you cook the pita. The smell of rising dough always brings a sense of calm; it’s that comforting reminder that good food takes just a little time.
Shape the Pitas
Once the dough has doubled, punch it down to release excess air and divide it into 8 equal pieces. Roll each piece into a smooth ball, then cover them with a towel and let them rest for 10 minutes. This short rest makes the dough easier to roll out.
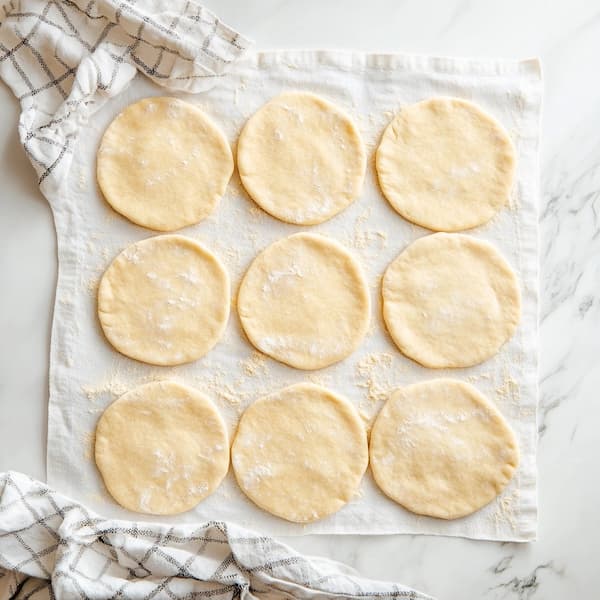
After resting, roll each ball into a 6-inch circle, about ¼ inch thick. Try to keep the thickness even so the pita puffs uniformly.
Choose Your Cooking Method
Here’s the fun part — you can make pita bread in the oven or on the stovetop. Both work beautifully.
Oven Method
Preheat your oven to 475°F and place a baking stone or an upside-down baking sheet inside to heat up. When hot, place 2–3 pitas on it at a time. Bake for 3–5 minutes, until they puff up like balloons.
As soon as they start to brown slightly, remove them and wrap them in a clean kitchen towel to stay soft.
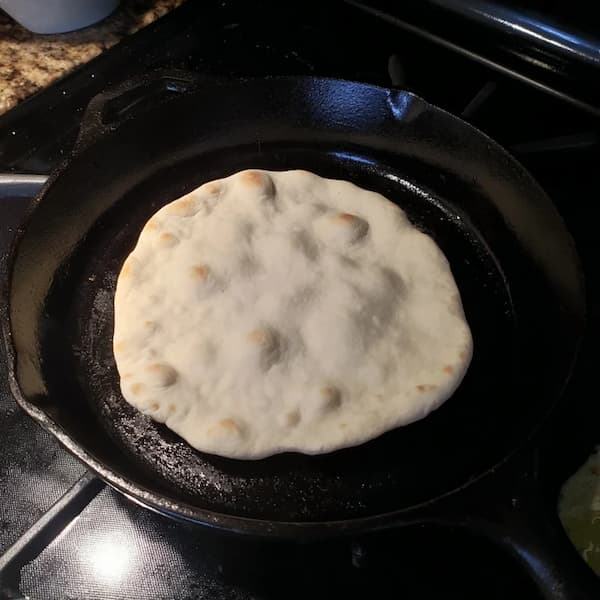
Stovetop Method
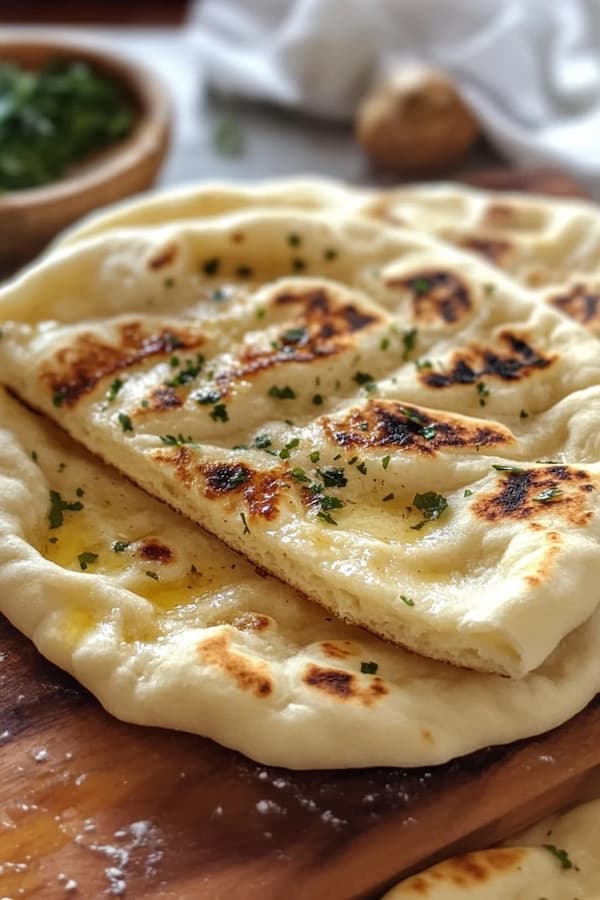
Heat a heavy skillet or cast iron pan over medium-high heat. Place one pita at a time in the pan and cook for about 1 minute per side. It should start puffing up as the heat hits the dough. Flip once it’s golden on one side.
This method gives you more control and a bit of charred flavor — my personal favorite.
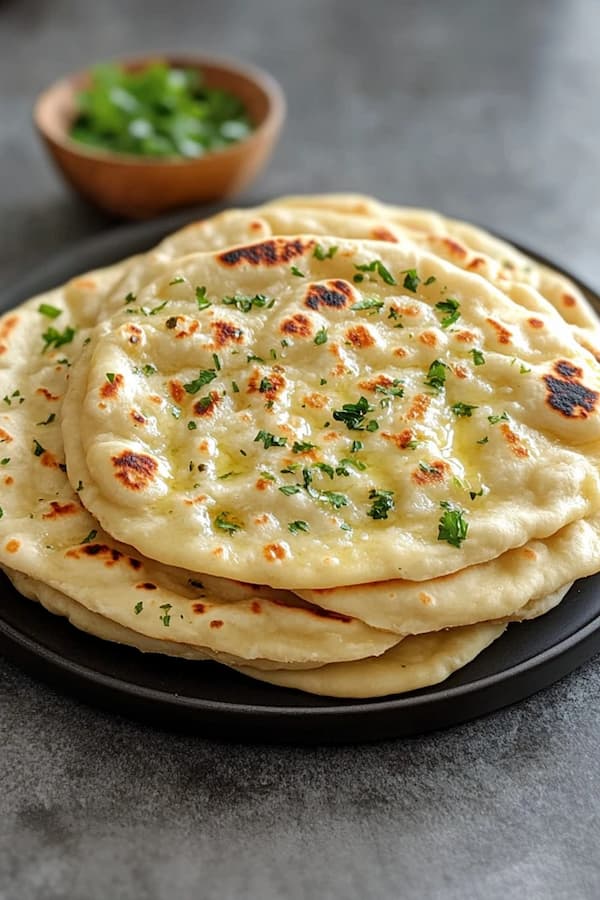
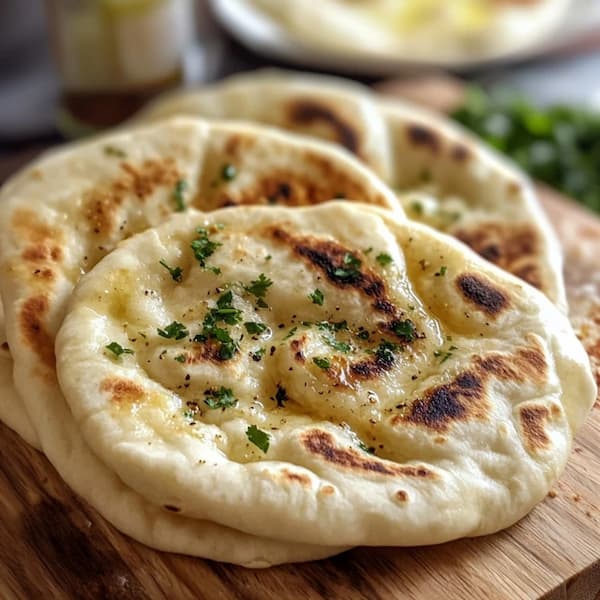
Cool and Serve
Once cooked, keep the pitas wrapped in a towel until you’re ready to serve. This helps trap steam and keeps them soft and pliable.
Homemade pita is best enjoyed warm, but you can also store leftovers for later — they reheat beautifully.
Tips for Perfect Pita Bread
- Hot surface = perfect puff: Whether using the oven or pan, make sure it’s preheated and hot.
- Don’t roll too thin: ¼ inch thickness is ideal for those signature pockets.
- Let the dough rest: This helps the gluten relax and makes the pita soft.
- Cover after cooking: Keeps the bread moist and flexible.
- Use fresh yeast: It makes all the difference for that airy rise.
Fun Variations
Homemade pita is like a blank canvas. You can brush it with garlic butter for a flavor twist, sprinkle sesame or nigella seeds before baking, or even make whole wheat pita by swapping half of the flour for whole wheat.
If you want a sweet version, mix in a little cinnamon and honey before kneading and serve it with fruit or yogurt — it’s an underrated treat.
Why I Love This Recipe
For me, making pita bread at home feels like slowing down in the best possible way. The smell of warm dough, the moment it puffs up in the oven — it’s one of those small kitchen joys that never gets old.
What I love most is the versatility. One batch can turn into wraps, sandwiches, pizza bases, or even chips if you bake the leftovers. It’s simple, budget-friendly, and surprisingly impressive when served fresh from the pan.
Storing and Reheating
Store pita bread in an airtight container or zip-top bag at room temperature for up to 2 days. For longer storage, refrigerate for up to 5 days or freeze for up to 3 months.
To reheat, wrap in foil and warm in the oven at 350°F for about 5 minutes or microwave for 10–15 seconds with a damp paper towel. It brings back that just-baked softness.
Final Thoughts
Homemade pita bread is proof that some of the best foods are the simplest. With just a few ingredients and a little patience, you can make warm, soft, and flavorful pitas that will elevate any meal.
They’re light enough for everyday use yet special enough to impress guests. Whether you’re making wraps, mezze platters, or just dipping into hummus, this pita bread is the perfect base for everything.
Once you make it from scratch, you’ll never look at the store-bought kind the same way again.
Can I Make Pita Bread Without a Baking Stone?
Yes! If you don’t have a baking stone, flip a sturdy baking sheet upside down and preheat it in the oven — it works just as well. The key is getting that surface really hot, so the pitas puff up instantly when they hit the heat.
Why Didn’t My Pita Bread Puff Up?
There are a few common reasons: the dough might have been rolled too thin or uneven, your cooking surface wasn’t hot enough, or the dough didn’t rest long enough before baking.
Even if they don’t puff perfectly, they’ll still taste amazing — just think of them as soft flatbreads instead!
Ingredients
Method
- In a large bowl, combine warm water, sugar, and yeast. Let it sit for about 5 minutes
- Add flour, salt, and olive oil. Mix until the dough starts to come together, then knead for about 6–8 minutes on a lightly floured surface until smooth and elastic.
- Place the dough in a lightly oiled bowl, cover it with a damp towel or plastic wrap, and let it rise in a warm spot for about 1–1.5 hours, or until doubled in size.
- Once the dough has doubled, punch it down to release excess air and divide it into 8 equal pieces. Roll each piece into a smooth ball, then cover them with a towel and let them rest for 10 minutes.
- Preheat your oven to 475°F and place a baking stone or an upside-down baking sheet inside to heat up. When hot, place 2–3 pitas on it at a time. Bake for 3–5 minutes, until they puff up like balloons.
- Heat a heavy skillet or cast iron pan over medium-high heat. Place one pita at a time in the pan and cook for about 1 minute per side. It should start puffing up as the heat hits the dough. Flip once it’s golden on one side.
Notes
- Hot surface = perfect puff: Whether using the oven or pan, make sure it’s preheated and hot.
- Don’t roll too thin: ¼ inch thickness is ideal for those signature pockets.
- Let the dough rest: This helps the gluten relax and makes the pita soft.
- Cover after cooking: Keeps the bread moist and flexible.
- Use fresh yeast: It makes all the difference for that airy rise.